FLAVOR ENHANCER / SALT ++
LONG FERMENTATION (3 to 12 months)
What is Miso ?
Miso is to the Japanese what cheese is to the French: it is a staple food, a true pillar of the Japanese cuisine.
It is made from a mixture of soybean paste, a cereal inoculated with a mold (KOJI) and salt. This mixture is then aged for several months, it offers it a rich and deep Umami flavor.
There are approximately as many miso as there are cheeses in France. The color can vary from blond to brown, the notes and potency vary depending on the fermentation time, the amount of salt used and the type of koji chosen. Although it is traditionally made from soybeans, miso can also be made with other legumes such as lentils, chickpeas or beans.
A bowl of Miso per day keeps the doctor away !
Miso is very rich in iron, zinc and B vitamins.
It facilitates digestion thanks to the many lactobacilli it contains and helps to reduce cholesterol levels. In addition, its alkalizing effect helps prevent fatigue.
This fermented paste also has the particularity of enabling the elimination of toxic elements and heavy metals, which is to say how rich it is! For example bowl of soup, a day is strongly recommended for smokers or people who are frequently exposed to air pollution.
How to use it?
Miso is a flavor enhancer that can be used in dishes, just like salt. You may add it at the end of cooking in order not to destroy the enzymes and vitamins it contains.
If you are new to this world, here are some very simple ways to incorporate miso into your diet:
- In vinaigrette : replacing or in addition to mustard
- In soup: one teaspoon per bowl
- In sauce : by adding a big teaspoon in tomato or cream sauces
The advantages of making your miso at home
Miso is a very rich in nutriments and simple fermented food to make at home.
Making your own miso will be 5 times cheaper than buying it in a store, this price obviously fluctuates depending on the legumes and cereals chosen.
Unlike the ones sold in supermarkets, your miso will be unpasteurized and therefore richer in flavor and better in terms of nutrition. You will also have the opportunity of creating an infinity of different misos!
Miso fermentation
Miso comes from a double fermentation: the first fermentation, short, is the production of koji, an essential ingredient in the production of miso.
The second fermentation, much longer, consists of mixing all the ingredients (koji, legumes, salt) then placing everything in a jar which will be left to ferment for several months. This second step is the making of the miso itself.
Here are the ingredients you will need to make miso: LEGUME + KOJI + SALT = MISO
- Legumes: You can use Soya, lentils, chickpeas, split peas… In Japan, miso is made with legumes available on the day of harvest, so do with what you have at home!
- Koji: the cereals widely used for making Koji are white rice and barley. I personally use white basmati rice because it contains complex sugars that mold particularly like
- Salt: the amount of salt will regulate the fermentation time of your miso, and therefore the type of miso you will make. Red miso has a longer fermentation and is saltier than blond miso. If you are new to fermentation, I recommend starting by making red miso because the salt it contains limits contamination. I would advise to use unprocessed salt.
An essential ingredient to make Miso : The Koji !
As mentioned above you need KOJI in order to make miso.
In a few words, Koji is a cereal (most often rice or barley) on which a mold known as aspergillus oryzae grows. This mold grows around the grains and surround with a fine white down. The inoculated cereal is then used as a ferment, it allows the fermentation of many essentials of Japanese cuisine such as sake, soy sauce, amazake.
It is possible to buy the koji already ready-made, however, as this fermentation is quite simple, I advise you to do it yourself! You will make great savings and will be amazed by the smell of the fermentation.
If you are already familiar with making tempeh, making koji will be quite easy for you. Indeed, the mold aspergillus oryzae thrives in conditions similar to the mold used to make tempeh.
Thus, and as for tempeh, it will be necessary to give the mushroom the conditions favorable to its good development, including as follows:
- Moisture: obtained by steaming rice grains. It is important to steam the grains so that they are neither too dry nor too wet. The beans should remain “al dente”.
- Temperature around 30°C. after cooking, the cereals must be spread out quite thinly, this prevents the koji from overheating and facilitates the mixing of seeds during fermentation.
- Oxygen: Aspergillus oryzae needs air to grow, so use a box with a loose lid that keeps the seeds moist while letting them breathe.
Recipes
Étape 1 / The ferment recipe : The Koji

What you need :
For around 400 g of Koji
- 250 g of rice
- Koji starter (aspergillus oryzae strain)
- A steamer
- A stamen
- A tray
Steps
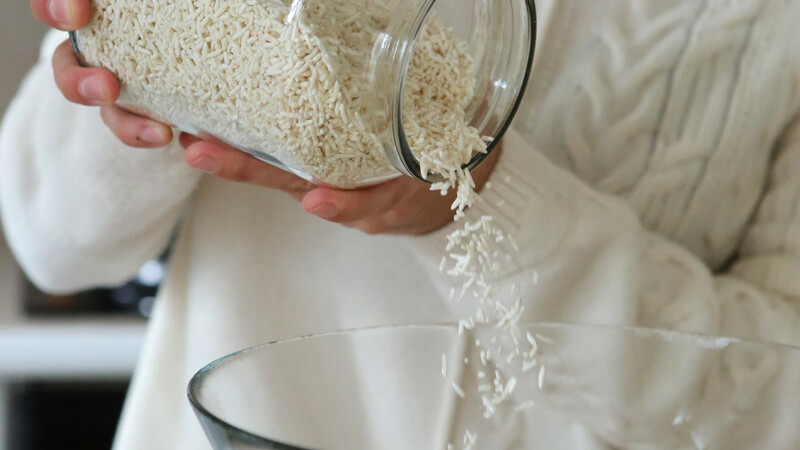
Rinse the rice until you get clear water then immerse it for about 10 hours in a large volume of water.
Drain the rice and steam it until tender but not overcooked (approximately 30 min), the rice has to be a little bit crunchy.
It is important that the rice is steamed and not directly in water to prevent it from being too soggy.
Wait for the temperature of the rice to drop to around 35°C then inoculate it with the Koji stater ferment (3g / kg of cooked rice). Mix well to dispense the spores..
In a large cleaned tray, wrap the inoculated rice in the stamen and arrange it in a thin layer. This allows the ferment to breathe while maintaining the moisture in the grain.
Put the box to ferment at 30°C.
Stir the rice fairly regularly (about every 5 hours) so that the fungus colonizes all the grains of rice.
Your Koji is ready when the grains are covered with a white mold. It usually takes about 36 to 48 hours.
Did my Koji fermentation go well ?
My Koji went marvelous :
- The smell is pleasant: the Koji must smell sourdough with notes of chestnut and citrus
- Cereal seeds are covered with a white film
- Rice clumps may have formed
- If you let your Koji ferment for more than 48 it may turn a little green: your Koji has fermented for too long, stop the fermentation.
- The smell is unpleasant Presence of strange coloring (pink, green …)
- There is excess moisture in the rice
- The rice is not colonized
How do I store my Koji ?
The Koji can be kept in the fridge for 3 weeks, you can also freeze it to prolong its conservation up to 3 months. A final option is to dehydrate it at 35°C and then store it in a sealed container.
Étape 2 / Miso recipe

What you need :
For 1L Jaar :
- 200 g of legumes of your choice (soya, lentils, chickpeas, etc.
- 250 g of fresh Koji / or 200 g of dehydrated koji previously rehydrated with 80 g water
- 75 g of untreated sea salt for red miso / 37.5 g of salt for blond Miso.
Étapes
Soak the legumes for about 12 hours.
Rinse the legumes then put them to cook in water
Once cooked drain them while making sure to keep the cooking water for later use.
Mixer les graines pour obtenir une pâte, ne pas hésiter à rajouter de l’eau de cuisson si besoin.
In a separate bowl, mix the koji with the salt.
When cool enough to handle, add the legume paste to the bowl. The goal will be to obtain a firm and moist texture a bit like modeling clay, so do not hesitate to add water if you find that the dough is too dry.
.
Form balls with the preparation, place them in the bottom of the jar, then pack. This helps to avoid air bubbles. Repeat the operation until all the preparation is empty.
Tap the jar to pack the preparation well and remove any air bubbles.
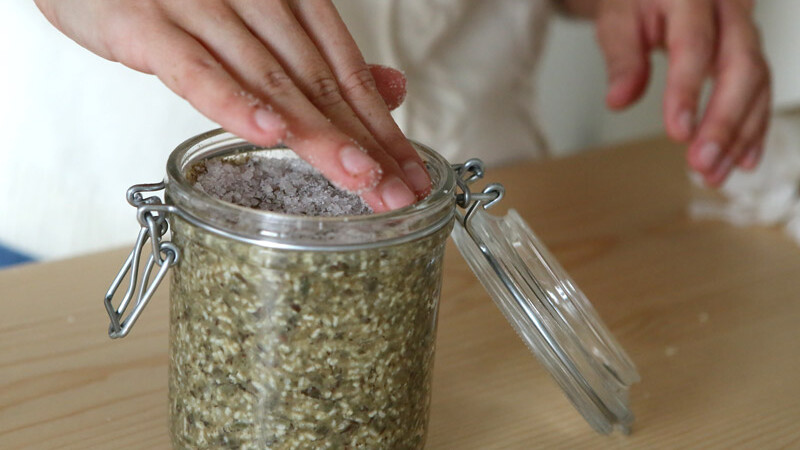
Sprinkle around the jar with a solid layer of salt and cover the surface with a cup.
If you have chosen the amount of salt to make red miso, place the jar in a room in your house that is subject to seasonal temperature variations. The room should be cooler in winter and warmer when spring comes. Your miso will be ready in 12 months
If you have chosen the right amount of salt for blond miso, you can let your miso ferment at room temperature, it will be ready in 3 months.
Is my Miso successfully fermented ?
In general, the visual aspect is not a good indicator of whether your miso is successful: although a miso must have a homogeneous appearance, the top of the miso may be darker than the bottom. It is also possible that an unsavory mold has formed on the surface of your miso, this does not mean that your miso is not good! remove it and see if the miso underneath has a homogeneous appearance.
Instead, trust your instincts and your sense of smell: a successful miso must smell good and must make you want eat it if so, that’s a good sign.
Keys to succeed in making Miso ?
Once the fermentation is complete, the miso must be kept cool/ at a low temperature . An opened jar can be kept for 6 months in the refrigerator.
Keys to succeed in making Miso
Pay attention to sanitation
Like all fermentations, care must be taken to work in a clean environment. Its not mandatory to disinfect everything with alcohol, however, clean your hands, your workspace and your utensils before starting to make your miso. Also put your fermentation jar in boiling water before adding your Miso !
Avoid air galleries promotes contamination
The presence of air galleries promotes contamination, this is why the texture of your mixture must be quite moist. It is better to have more water than not enough !
Start your Miso in winter
If you are making red Miso start it in winter from October to February so that it starts its fermentation with low temperatures.
Use spring water / at least dechlorinated water
As we work with a whole army of microorganisms, we must promote a healthy environment. To dechlorinate your water, fill a pitcher with tap water and let it sit in the open air.